

How to Use Reverb: The Ultimate Guide for Music Producers
"You don't learn to walk by following rules. You learn by doing, and by falling over."
— Richard Branson
Learning how to use reverb is absolutely essential to your music. In fact, it’s crucial to our lives.
All around us are sound waves, at all times. The click of my fingers on this keyboard are bounced off the wall behind me. Into the room in front me. Absorbed and further reflected by the guitar, couch, and surfaces within the room.
My brain doesn’t hear it consciously, but my primal sense is stitching those signals together at lightspeed to create an auditory map of the environment. This happens every day of our lives.
Every space we’ve ever been in has a natural reverberation of sound waves. We only become aware of it when the size of the space is so large the reverberation lingers longer than we’re used to experiencing, like a parking garage, amphitheater, canyon, or cavern. In fact, a lack of reverb is highly unsettling and extremely unnatural.
I’ve put together a comprehensive guide for how to use reverb like a professional. Just like anything within music production, knowing the principles isn’t enough. You must also have the right tools, and know when to use them. We’ll cover all of that below.
Before we go too deep into this, I’ll share one of the fundamental secrets for creating space in your productions. It’s simple, but important.
You must know when to use delay instead of reverb.
When in doubt, remember this: use delay to keep your source present and up-front. Use reverb to put the sound into a space: as near or far, big or small as you want.
A Roadmap for Next-level Reverb
This step-by-step guide will walk you through adding reverb in your mixes. Some of the most crucial uses for this effect are included, like adding the tail to a hi-hat, creating a virtual room, and processing vocals. My favorite plugins are in here (but If you can only afford one, make it Valhalla Room). Follow this process for decision making, and you will level up your reverb game instantly.
1. Reference to Set Your Reverb Levels
Really, lesson one is not using too much reverb. But how much is too much, and how do you tell? If you know me, you know I’m all about referencing. It’s the answer every time.
Find a track with a similar vibe to the space you want to create. Set the volume of the reference to match the level of your track, and choose an instrument to focus on. Ask yourself these three questions:
1. Are there moments when this sound feels closer or farther away? That could indicate automation of the send amount, or it could mean that the reverb is sidechained to the main instrument.
2. Which instruments feel closer or farther away than this sound? Remember, our perception of distance is also influenced by volume (lower level sounds feel more distant) and high frequency content (removing the highs will push a sound to the background).
3. Is the reverb felt rather than heard? In other words, is it hard to hear, but you sense it’s there? That means short decay times or slapback delays are being used.
2. Start Using Reverb on Dry Samples
There’s a secret most sample-pack companies don’t tell you.
Room noise, reverberation, and any sense of space is typically removed from samples to give producers ultimate flexibility for including those sounds in their own productions.
The problem is, many producers are unaware that the samples they’re using were meant to go through an additional level of processing. They unknowingly stick a bone-dry sample into a song and call it a day.
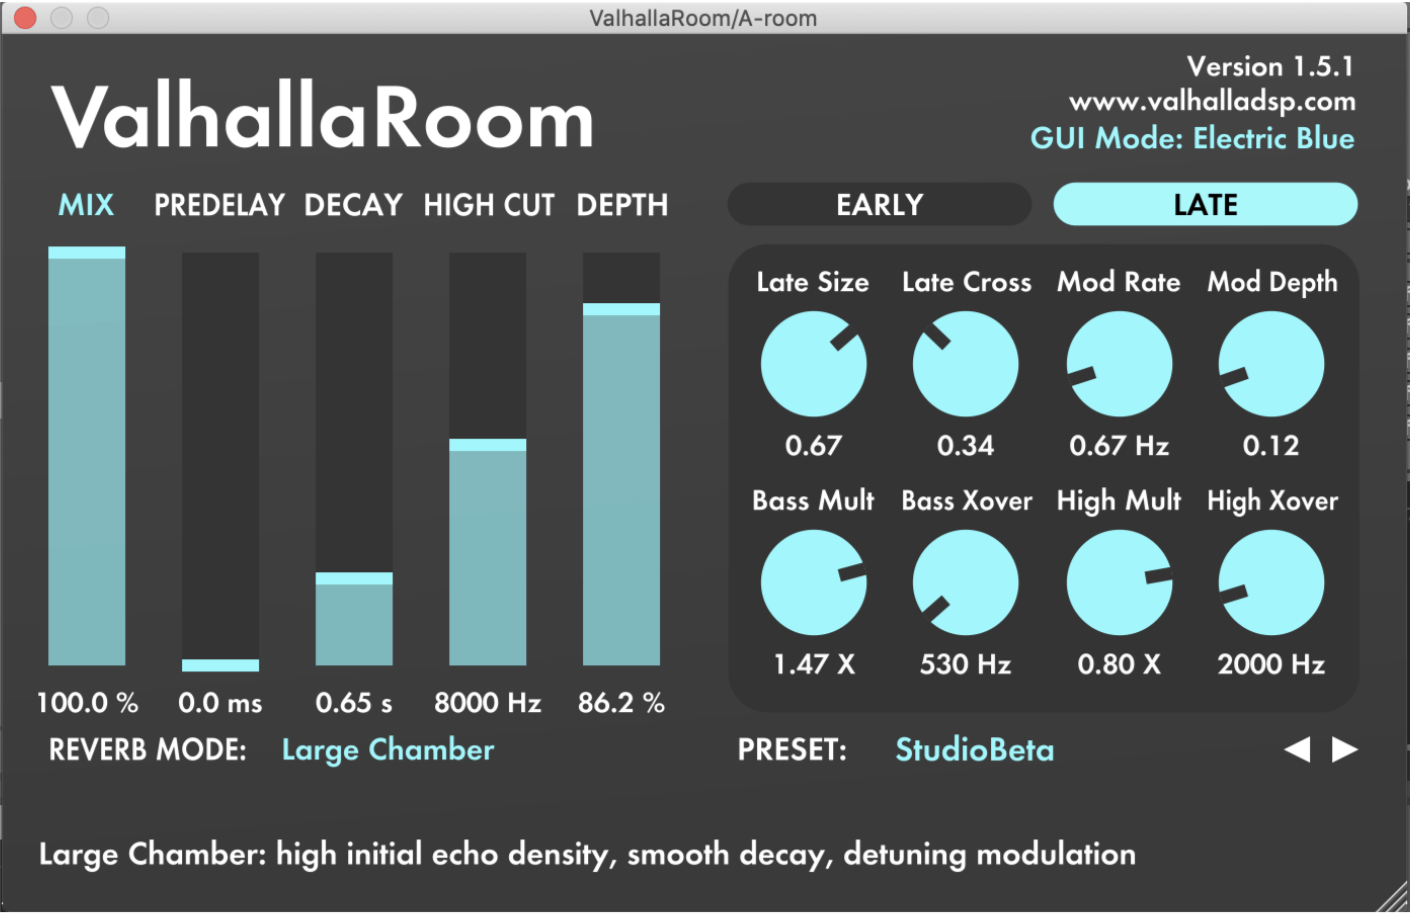
Our ears would never hear a hi-hat the way a microphone does. Adding a room reverb to your hi-hats — and really all drums — is essential for creating the feeling that these sounds are all happening in a real, live space.
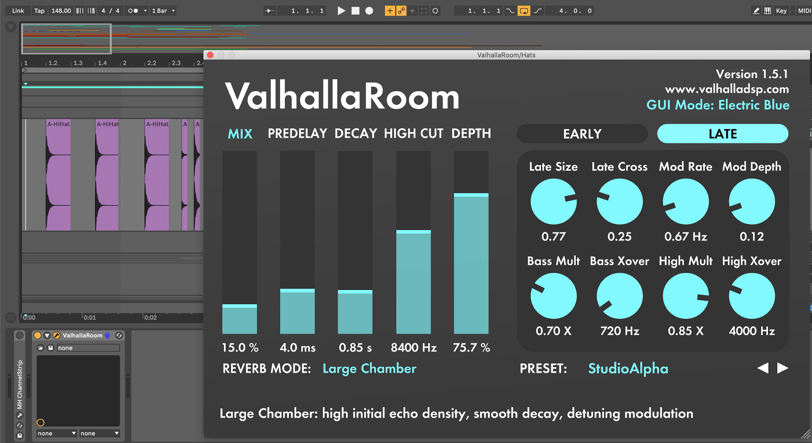
In this photo, I’m using Valhalla Room as an insert on the hi-hat track. Notice the mix is at 15%. That’s because at 100%, all you would hear is reverb, and we don’t want that.
Running reverb in-line on tracks is a great way eat up your processing power. It also means there’s no shared sonic identity among the instruments, which is a key element of creating a cohesive mix. This leads me to the single most important strategy for using reverb in your DAW:
3. Use Reverb on a Bus
This tactic alone will take you from a reverb amateur to an up-and-coming pro. Instead of placing plugins on individual tracks, create a return channel, sometimes called an aux track or bus (these terms are used interchangeably). Now you can send any track in the project to this bus, at any level you choose.
When working with reverb on a return channel, use a mix of 100% (fully wet). Allowing any dry signal to pass would simply increase the level of the original source. You can blend it to taste by adjusting the send level from the source track, and don’t forget that you can lower the volume of the reverb bus by a few db until it sits in the mix.
Using reverb on a bus gives you a couple massive advantages. Apart from sending multiple instruments to your reverb to create a sense of cohesion, you can now...
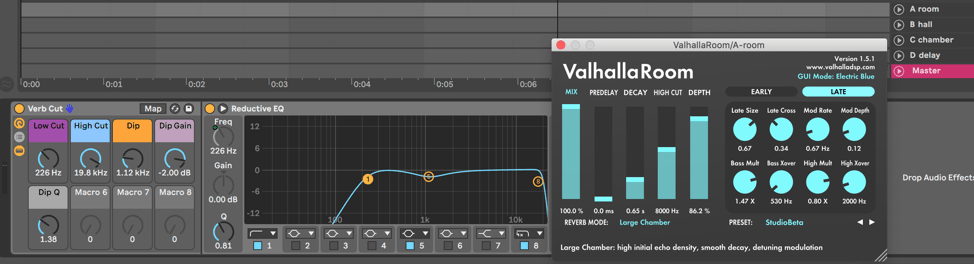
4. EQ and Process the Reverb Bus
Processing your reverb bus is a best practice. These are the three most common ways I process reverb – and, no surprise, they’re also the three most powerful mixing tools. For this example, let’s create the perfect vocal reverb.
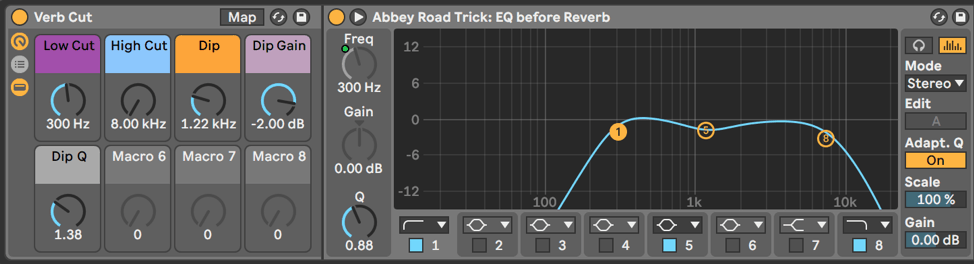
EQ – The Abbey Road Trick
Abbey Road Studios has a signature way of processing reverb: They EQ the bussed signal before sending it to a plate or chamber. Start with a low-cut around 300 to 500 Hz, and a high-cut anywhere between 5 kHz and 10 kHz. It’s a simple move, but one I do on every reverb bus.
You don’t need those low frequencies rumbling around - keep it light and airy, but remember it’s a fine line...you don’t want sibilant high frequencies to set off spikes in your reverb either. The low-cut and high-cut filters ensure that only the sweet spot of your source signal hits the reverb.
As a final measure, consider using a parametric bell to dip the midrange if that’s where the main instrument resides. For the EQ on my vocal reverb bus, I’m going to drop the 1 kHz range by 2 db using a wide bell. This helps to keep the character of the vocal present and up-front.
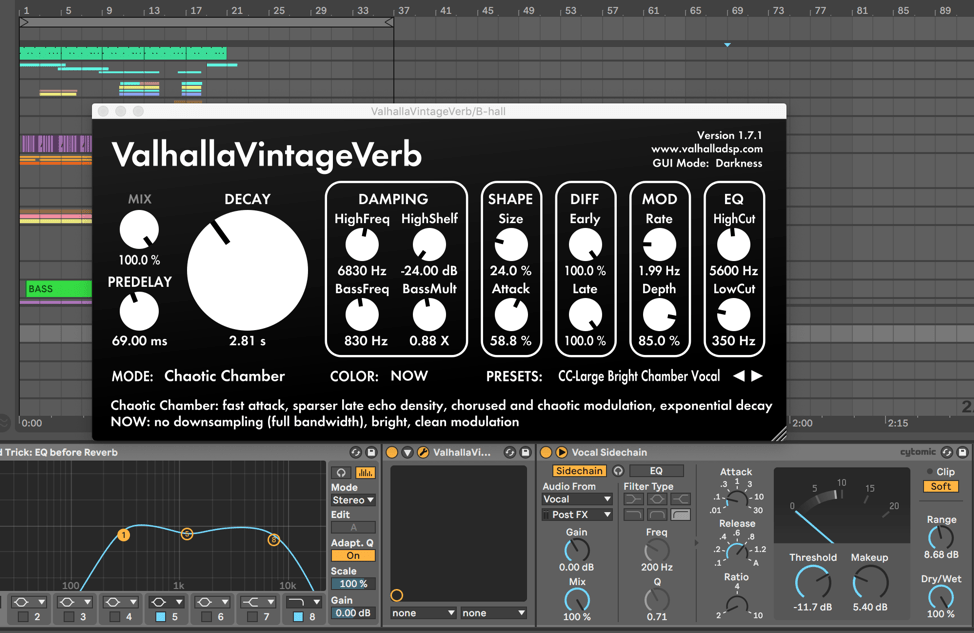
Sidechain the Reverb
This is one of my favorite tips for working with reverb. Have you ever found a setting that sounds great for the reverb tails... only to discover how it washes out the instrument while playing?
The solution: sidechain the main instrument to a compressor on the reverb bus. Place a compressor after your reverb, and set the sidechain input as the source signal (in this case, the lead vocal).
I’m using a glue compressor to drop the reverb by 3-5 db when the lead vocal is singing. By finessing the attack and release times (I prefer a faster attack and slower release), the reverb stays out of the way of the lead vocal while blooming in the gaps between phrases.
Saturate/Distort the Reverb
I’m a fan of using guitar amps on reverb busses. Most DAWs have their own amp emulations, but you can use any distortion. I’ve found that the Waves GTR clean amps work especially well on reverb busses. Amping your reverb creates a commercial brightness that can be quite effective on lead sounds. The OTT compressor on light settings will also brighten up verbs and give them a modern, electronic sound.
Placement matters - you can either distort the source sounds before it hits the reverb, or take the whole reverb and re-amp it. Try both out to see what works best for your track.
I hope you’re starting to see why reverbs are a hell of a lot easier to control when you use them on a bus. You can go to town processing the sound, trying new things, and using the space you create for multiple instruments at once.
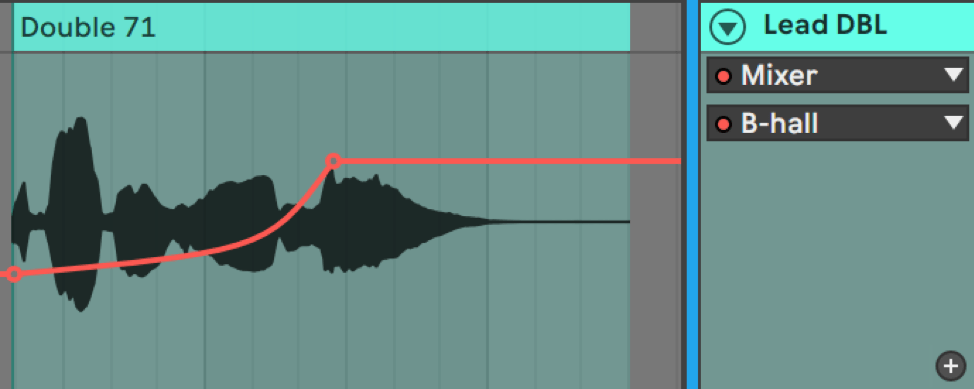
5. Automate the Reverb Send Amount
In real life, sounds are constantly shifting in and out of our hearing. We approach each other to speak, a car drives by, a door closes, the sound of a piano drifts from an open window as we walk by...
Think of the amount of signal you send to the reverb bus like a camera zooming in and out on the sound. Keeping the send level low makes it feel like we’re standing next to the sound. Bringing the send level up increases the volume of the reverb, tricking our brains into believing the sound is farther away.
You can make your music come alive by automating reverb sends. How would it feel if you were introduced to a new guitar lick that felt far away, but by the time the chorus hit it was right next to you?
It’s attention to detail like this that sets a production apart. You could craft an emotional journey through a space of your own creating, or you could find a reverb level that works and call it a day. One is uncharted territory. The other sounds like a live recording from a stage. The choice is yours, but you should know it’s a choice you have.
I like to automate the vocal reverb send during key moments, like at the end of a chorus as the song crescendos into a breakdown or epic build. These little reverb and delay throws can be the difference between a killer production and a flat track.
6. Unleash the Power of Short Reverbs
One of the most important lessons in stepping up your reverb game is to embrace the power of short reverbs (decay time of less than one second). Short reverbs create ambience and air around sounds.
They are felt rather than heard, and many producers spend years overlooking what a short reverb can do for their music. Short verbs hit the sweet spot for adding realism to a sound without creating noticeable tails, and are one of the secret weapons in a mature producer’s toolbox.
Creating a Virtual Room
Since short reverbs emulate the rooms we hear in real life, you can create virtual “room” for your mix to live within. This is extremely effective at making all your sounds feel like they belong together. Set up a reverb bus in your DAW, EQ the bus with the Abbey Road Trick, and send nearly everything in your track (except the kick and sub-bass) to this room reverb at small amounts (no louder than -18 dbs).
From time to time, solo this room reverb bus to see if it matches the overall vibe of your mix. Are the guitars dominating the room? Turn their send levels down. The room should be an accurate representation of how you want the balance of the mix to feel.
Adding Ambience to Samples
Use short reverbs to add a touch of life to dry samples like snaps, hats, claps, and snares.
7. Know the Type of Reverb you Want
Time to select your tools. First you should become educated on the different types of reverb.
- Real-world reverbs: Rooms, Echo Chambers, and Convolution Reverbs are built to give us the sound of reverb that occurs naturally. Rooms are great for adding realism and felt space to a sound. Echo Chambers take us back to the 60’s and sound great on vocals, snares and guitars. Convolution Reverbs are a special beast, and allow us to inject the snapshot of a real-world space directly into our DAW.
- Analog reverbs: In the early days of recorded audio, crafty engineers set their mind to creating reverb using physical materials. Some of the most famous are Plate Reverbs and Spring Reverbs. These do not sound like any real-world environment, but their color and tonality is unique and beautiful nonetheless.
- Digital reverbs: In the late 70’s, companies like EMT and Lexicon realized reverb could be mathematically calculated and written as code. They brought us the first Algorithmic Reverbs, originally in the form of hardware. Algorithmic reverb is the most common type these days, and most reverb plugins (except convolution reverbs) use some type of algorithm to produce their sound.
Part of your homework as a producer is to learn your tools. Plates sound different than springs. You wouldn’t use an impulse response for the Taj Mahal when trying to create an intimate ambience around an acoustic guitar.
Dust your reverbs off and get a feel for how they respond to different source material. Some will sound best at short decay times, and you’ll prefer others for their long tail. Find a few you really like, and commit to learning them like the back of your hand.
Here are my suggestions:
8. Choose the Right Reverb Plugin
Valhalla Room
If I could have only one reverb plugin, it would be Valhalla Room. For $50 you’ll be covered with the best ambiences out there, and it also sounds epic at longer decay times: the halls, chambers, and plates are all brilliantly modeled. Highly recommended.
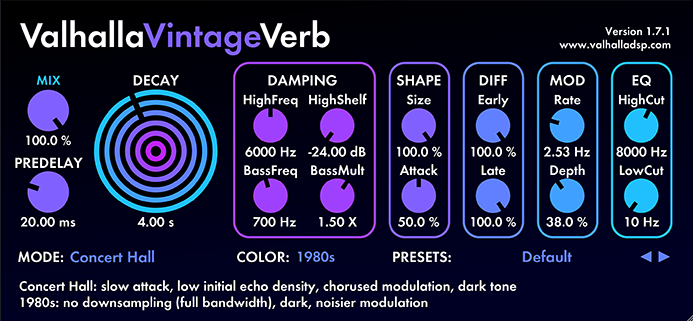
Valhalla Vintage
Right behind Valhalla's Room reverb plugin, is Valhalla Vintage. Again, for only $50 you’ll be able to tap into 17 reverb algorithms and 3 colors modes that span the sounds of the 1970s, 1980s and current landscape of reverberated technologies.
Basically, the further back in time you go, the less accurate the high end of your reverb will be, resulting in dark, noisy, and strange reverbs that accurately mimic the decade they attempt to recreate.
A Trusted Algorithmic Reverb
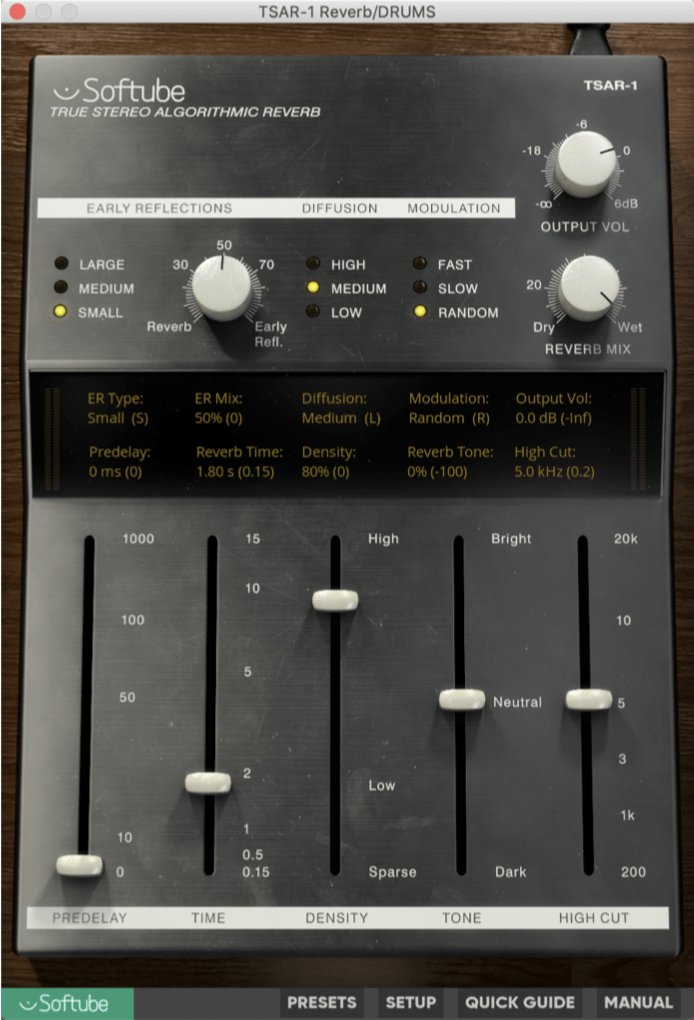
I recently discovered the Softube TSAR-1. This reverb actually sounds 3D, and it’s so simple to use. I especially like the TSAR-1 for short reverbs, but the longer decay times are quite lush as well.
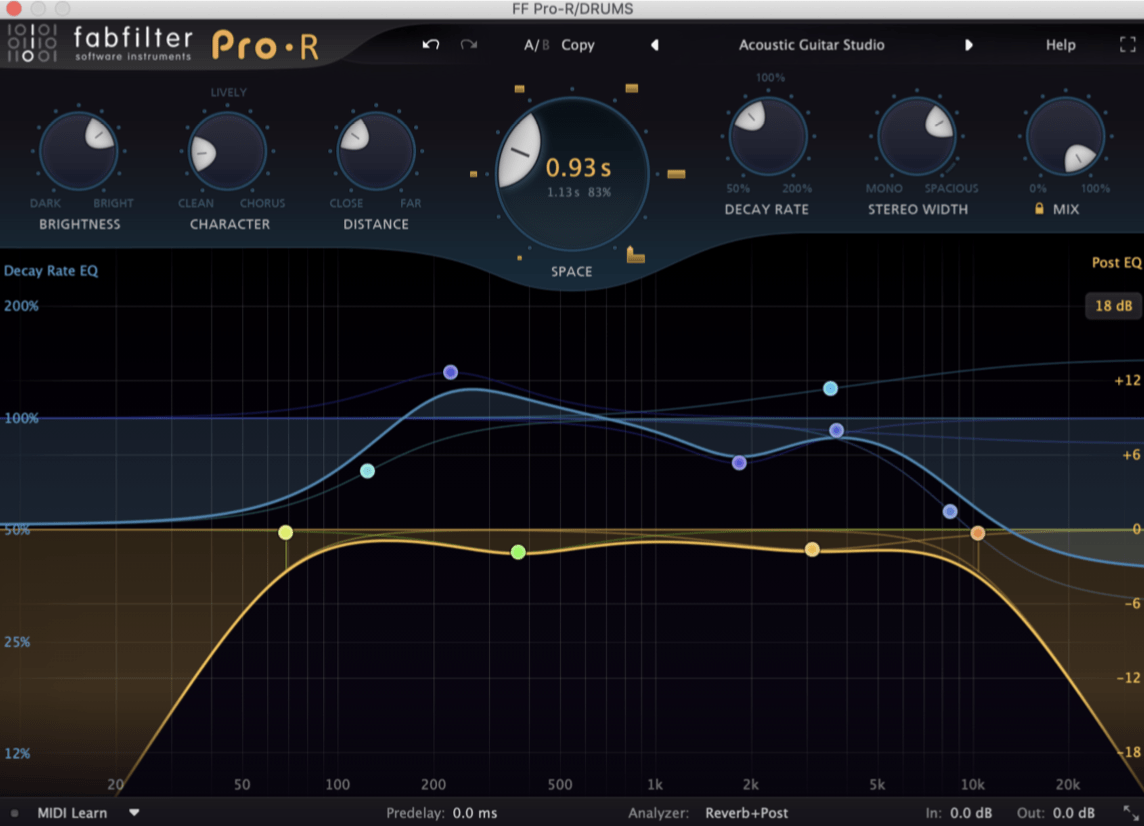
The Fabfilter Pro-R is extremely customizable without being overwhelming. The decay-specific EQ is what sets Pro-R apart - it’s best in class for allowing you to sculpt the exact tone you want. Apart from Valhalla Room, the TSAR-1 and Pro-R are my go-to reverbs.
Convolution Reverb
Most DAWS come with a convolution reverb. But unless you are using Logic and have access to Space Designer, you'll most likely want to invest in a third party reverb.
Ableton Live's stock convolution reverbs are fine for beginners and hobbyists, but won't cut it for professionals and anyone trying to make the highest quality music imaginable. The stock reverbs simply aren't expensive sounding enough.
Convolution reverbs are highly flexible, but they’re only as good as the impulse responses you use. All convolution reverbs will have a stock set of impulse responses, but the real fun comes when you start hunting down or making your own.
There are excellent free libraries out there, like these ones from SignaltoNoize and Flo Audio. Convolution reverbs allow you to get real plates, springs, and spaces into your productions.
If your DAW doesn’t have a convolution reverb, an excellent third party alternative is the Fog Convolver from AudioThing.

Specialty Reverb
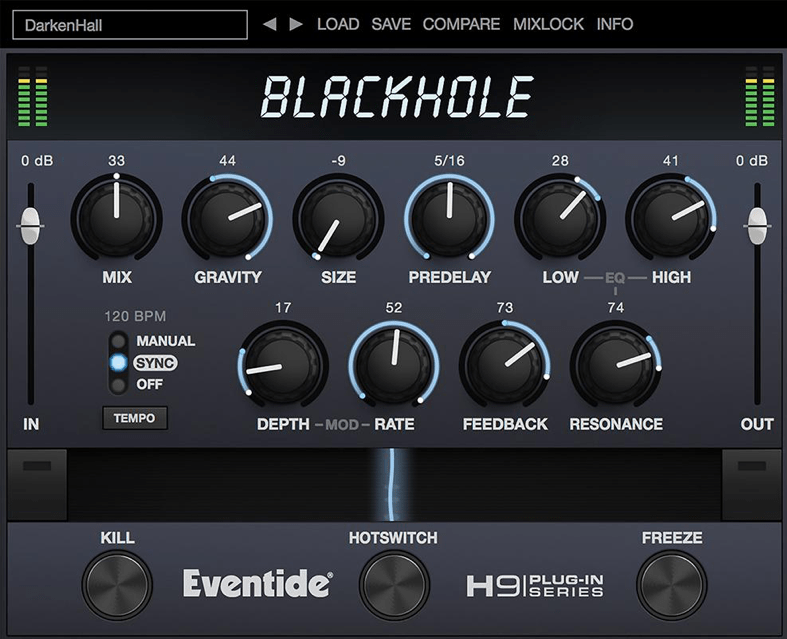
Two final plugins are worth a mention: Valhalla Shimmer and Eventide Blackhole. Both reverbs are built to create inherently unrealistic spaces, which means they sound far more unique than the average room. This makes them a secret weapon for sound design
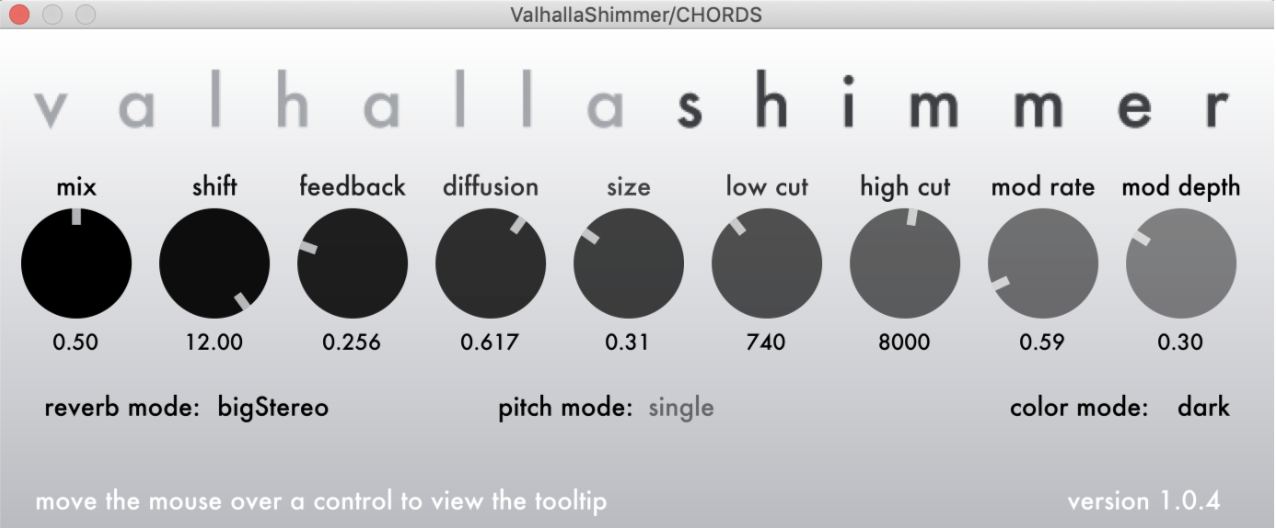
These reverbs sound best as special effects, not “always on” reverbs. In other words, automating the send amount during key moments is crucial for their impact, and will keep them from cluttering up your mix.
9. Set the Decay Time and Pre-delay
The decay time is the most important parameter of this effect. It determines the length of the tail, or how long the the reverberations will occur. Be wary of long decay times (anything over 3 to 4 seconds, depending on genre) – they can wash out an entire mix if the arrangement is crowded.
I used to think longer decay times made for better reverb. Now I’m always trying to see how much I can get away with shortening the length of the reverb. When I find a preset I like, I pull down on the decay time until I lose the character of what made me like the reverb. Then I slowly raise the decay until I start to hear it again.
Predelay is often overlooked, but it does wonders in keeping a reverb from overwhelming the dry signal. Is your reverb getting in the way of the main instrument? Increase the pre-delay until the initial transient separates from the reverb. Plus, the longer the predelay, the further away an element appears in the mix. This is great to remember when you are strategically placing reverbs in an effort to create spacial distances.
It all depends on the genre, but I find that reverb times around the 2 second mark (give or take a second) usually hit the sweet spot for me.
10. Consider the Stereo Placement of the Reverb
Now you’ve chosen the right reverb, applied the Abbey Road trick, sidechained the bus, and automated the send amounts during key moments in the song. You’re well on your way to using reverb more effectively. But there’s a final consideration in the step, and one that’s often missed.
You are not bound by law to keep your reverb bus panned dead center and at full volume.
Take a track, and pan it 25 degrees to the right. Send it to a reverb panned 25 degrees to the left, and all of a sudden you’ve opened up the stereo image in a fresh and interesting way.
You can also use two reverbs, panned almost entirely left and right, in place of a single effect plugin. This works especially well for vocals. As long as the decay time is close between the two, you’ll create a unique stereo image by differentiating the reverb on the left channel from that on the right.
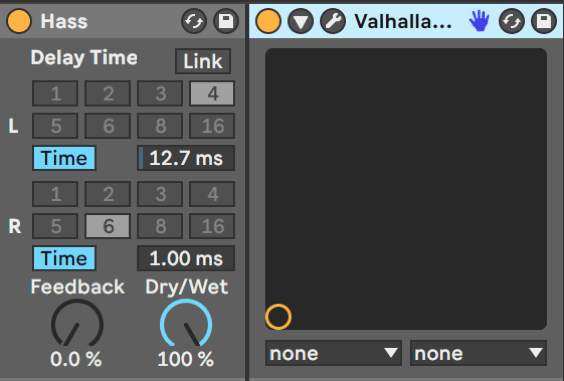
Finally, you can apply the Hass effect before reverb to push the source signal away from the center of the stereo spectrum. The Hass effect works by delaying the left and right side of a channel. This is great for pushing the reverb out into the sides of a mix, keeping space in the center for lead instruments.
Approaching Reverb Like a Professional
It’s taken me many years to understand how to approach reverb like a professional. These ten tips cover everything I’ve learned at a high level, including some of my favorite ways to use reverb and the best effect plugins for getting the job done when it’s crunch time.
Our ears are highly attune to the reverberation of sounds because it’s one of our must elemental survival instincts. Not only are we highly sensitive to a lack of reverb, but we’re also hypersensitive to unnatural spaces.
Using reverb in music is essential. It’s one of the most satisfying parts of creating a production, and I absolutely love the fact that every producer can create a space that’s completely their own. Where do you want your song to to take place? Do you crave the intimacy of a LA studio, or the cavernous echoes of the Grand Canyon? These choices are up to you.
If you follow these ten steps when thinking about reverb, you are guaranteed to be using it like a professional.
1. Reference to set your reverb levels
2. Use reverb on dry samples
3. Use reverb on a bus
4. EQ and process the bus
5. Automate the send amount
6. Unleash the power of short reverbs
7. Know the type of reverb you want
8. Choose the right reverb plugin
9. Set the decay time and predelay
10. Consider the stereo placement of the reverb
Are there any creative ways you’ve been using this effect? Any favorite plugins we should try? Let us know in the comments below.
These Might Also Interest You:
The 15 Best Reverb Plugins in 2024

Hyperbits
FOUNDER, HEAD-HONCHO, THE BIG CHEESE
A bit about me in case you're new here: my music has been streamed over 52+ million times.
I've done official remixes for artists like Beyonce, Tove Lo, and Nick Jonas, signed record deals with Universal, Island, and Sony, and worked with brands like Target, Samsung, and Equinox. I've even DJed some of the world's biggest stages, like Electric Daisy Carnival, Terminal 5, Fonda Theater, and Echostage.
If you have questions about music production or the Hyperbits Masterclass get in touch. I'm here to help.